Why would you want to learn how to make your own mobile phone signal booster? You’re probably not delighted with the monthly expenditures of having a mobile phone, but try living without one for a month.
When your phone is working well and you have a strong, clear signal, it seems to be well worth the money.
It might be aggravating, though, when you can’t receive adequate signal to make a basic phone call.
Unfortunately, while traveling a long distance between cities, it’s reasonable if your service is poor or non-existent.
Nonetheless, a surprising proportion of mobile phone users say that they regularly can’t obtain a signal inside their own homes or at work.
You’ve probably played hide and seek with the signal yourself at some point: standing atop a chair, burrowing under your desk, hanging out the window, or even adopting a yoga position.
Not to mention the times when an emergency arises and a quick phone contact is required! That’s why we thought it’d be fun for all of our readers to learn how to make their own mobile phone signal booster at home.
Isn’t that the case?
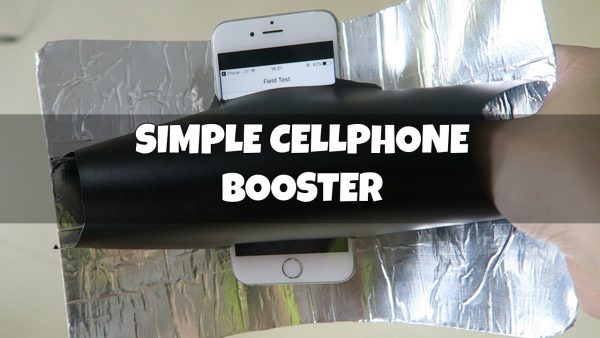
5 Ways To Make A Signal Booster For Your Cell Phone
You’re undoubtedly aware that commercial mobile phone signal boosters are available, but they may be expensive.
Amplifiers, repeaters, antennas, and even mini-towers are available, but they are prohibitively expensive.
Furthermore, the majority are not portable, therefore they are only useful in your house.
But, did you know that you can make your own mobile phone signal booster using affordable supplies from your local hardware or electronics shop, or even from your own garage? There are many different ways to make a DIY mobile phone signal booster, and many of them only need minor adjustments to one or two of the required items.
Let’s look at a few of them.
#1. Tin Can Signal Amplifier: A DIY Cell Phone Signal Booster
Gather Materials:
- Two 13-ounce coffee cans, a metal cookie canister, or something similar (the size of a soup can is too tiny);
- Antenna connector is a device that connects two antennas together.
- Copper wire with a thick gauge;
- Compatible pigtail connection for your mobile phone model;
- A soldering iron
- Solder;
- Mobile phone.
Step 1
Thoroughly clean and dry the cans.
Remove any paper wrappers and labels off the outsides of the containers.
One of the coffee cans should have one end left intact.
To make a tube, cut both ends off of the second can.
Carefully solder the open ends of both cans together using a hot soldering gun to make one taller can.
Before applying solder, remember to heat the area to be soldered using the tip of the gun for a few seconds.
You might also use adhesive-backed copper tape (metal tape, not paper) for this step, straddling the join between the two and pressing the tape firmly on the metal on either side.
Cut a circular hole 3.75 inches up the side from the closed bottom with a utility knife or tin snips.
To figure out how big the hole should be, measure the antenna connector’s neck.
Step 2
By putting a 3-inch piece of strong copper wire securely into the antenna connector’s end, you may complete the installation.
Because masking or duct tape will diminish the impact, solder copper wire in place.
This is how the antenna is made.
Push the completed antenna connection with copper wire through the hole on the exterior of the can just until the antenna connector’s shoulder reaches the interior of the can.
Place the nut on the shoulders of the antenna connection and tighten it into place from the inside.
If your hole is too big, you may need to add washers to finish this step.
Step 3
Screw the pigtail connection onto the end of the antenna connector that remains outside the can now that the antenna array is complete on the inside.
Connect the other end of the pigtail connection to the antenna port on your phone.
The other end of the pigtail connection should go into the charging port on your phone.
The gadget is ready to use as you plug it into your phone.
Simply point the open end of the can in any direction until a strong enough signal appears to allow you to make a call.
#2. Twist Tie Signal Booster: A Free Homemade Cell Phone Signal Booster
Twist ties (simply remove the ones off the package of bread – longer ones work best) are a simple and efficient solution to increase your phone’s signal.
This method works for mobile phones with an antenna stub and takes less than 30 seconds.
Wrap the twist tie around the bottom end of the stub a couple of times, leaving an inch or two of length protruding beyond the stub’s end.
The antenna is effectively extended, boosting signal strength and stability.
Secure the wrapped end by taping it in place.
#3. Mini External Antenna for Cell Phone Signal Booster
You may also make an external antenna out of any thin metal tube, such as a pen case or a metal drinking straw.
Tape one end of the tube to the top of your phone, allowing the tube to extend upward from the phone.
Wrap the cable around the metal tube and plug your phone into the USB charger.
With a metal spring clamp, secure the end.
The signal strength should have increased by one or two bars.
#4. The Best Homemade Signal Booster: Internal Antenna Extension
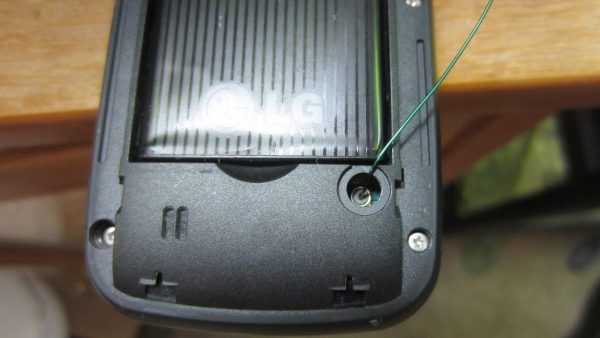
Start by removing the back of the phone for this DIY mobile phone signal enhancer.
The internal antenna port may be accessed.
Remove approximately 12″ of the insulation from one end of insulated magnet wire using a nail file or sandpaper and carefully slide the stripped end into the antenna port.
Cut the wire to a length of 6.3″ (1/4 wavelength), except the portion that will be placed into the port.
Bend the wire around the rear of the phone and tape it in place.
Extend the wire as an antenna all the way to the top of the phone.
Replace the back, which will keep the wire in place.

#5. LauC2 Antenna: Homemade Cell Phone Signal Booster
This third option is a little more complicated, but it is absolutely safe for your phone.
The majority of the materials may be found at your house or at a hardware shop.
Supplies
This is all you’ll need:
- Coat hangers with two wires (must be iron)
- Blocks of 20A cable connectors
- TV cable or coax cable
- Cutter of wires
- Pliers
- Screwdriver with a Phillips head
- Screwdriver with a flathead
Step 1
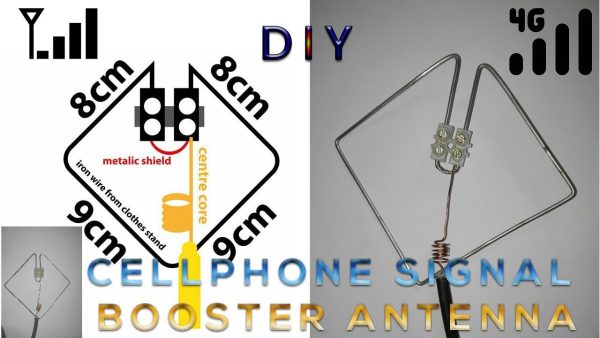
Start by straightening the coat hanger and cutting it to 42 cm in length.
Remove the paint or coating from the ends 4cm up using sandpaper.
You’ll now create a square with one open corner.
At the central point, bend into a 90o angle.
On each side, measure 9cm from the center and create a 90o bend at each mark (keeping in mind you are bending into a square).
Measure 8cm on each side and bend at a 45o angle toward the square’s center.
Bend the remaining 4cm on each end parallel to one another towards the middle of the square.
Place one of the connecting bricks into the holes.
Step 2
The coax cable will be required next.
To expose the bare wire, remove 20cm of the insulation and woven metal barrier.
Keep the metal shield safe.
To make a coil, wrap the exposed wire end slightly above the undamaged segment of cable five times around a pencil.
Place the opposite end of the connection block into the open end and tighten it in place.
To make a new wire, carefully twist the metal coil you set aside.
One end should be inserted into one of the connector block’s ports.
Connect the other end to a different port.
Step 3
To finish a second unit, repeat the operation, connecting the two units with the other end of the coax line.
Wrap the bare wire around the pencil seven times this time.
Two square wire units should be linked with a coax cable and have connection blocks and coils in the middle.
You’ve now completed the LauC2 antenna.
Step 4
Install one unit outside in a high open area, such as on the roof, and pass the wire through a window, avoiding window screens or metal trim.
Put it in a handy location.
This should boost your mobile signal by at least 2Gs.
It’s possible that you’ll have to move it around a few times to get the best position.
As you can see, making your own mobile phone signal booster is a simple and affordable solution to enhance and stabilize the signal on your phone when you’re in a low-signal region.
Final Toughts | Homemade Cell Phone Signal Booster
It’s critical to keep your phone charged as much as possible, since a low battery might make it difficult to pick up mobile signals.
Additionally, while utilizing a signal booster, whether commercial or homemade, battery power is depleted more rapidly.
If you still don’t get enough of a boost after completing your DIY mobile phone signal booster, go to higher ground, a clearing, or even at an intersection where trees and buildings won’t interfere with the signal.
Not all of these techniques are compatible with all mobile phones.
At your own risk, make these changes.
It’s possible that you’ll damage your phone, or that you’ll invalidate your warranty, if you modify your smartphone.
As a result, unless you are in an emergency scenario, it is not suggested that you use any technique that involves you to introduce anything into your phone.


