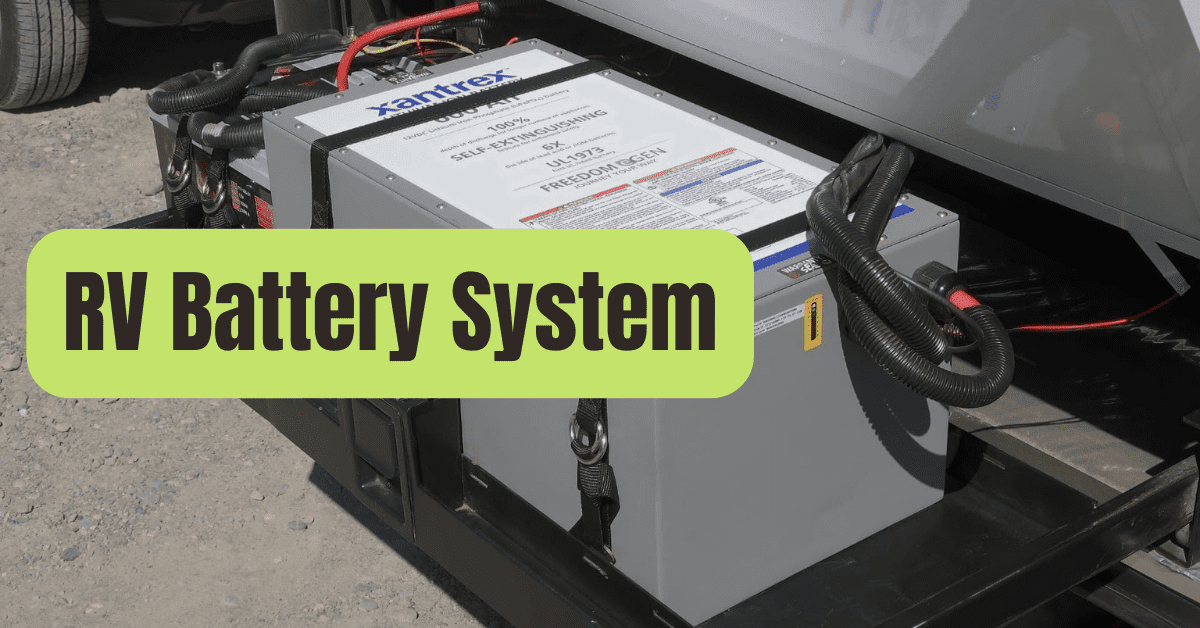
A crucial part of your rig’s internal configuration is its battery system.
Everything electronic in your RV, including the refrigerator, HVAC system, and ceiling vent fan, is run by it.
It’s crucial to realize that your RV coach battery is really composed of two separate systems: a 12-volt DC system and a 120-volt AC system.
Similar to a regular passenger vehicle, a motorhome also has a standard car battery that is used to start the engine.
The more potent battery is the 120 volt system, which is used to power large appliances like your refrigerator or rooftop air conditioner.
You need to be connected to shore power (as you typically are at a developed campground) or running an electricity generator that can charge such a large battery in order to operate this battery.
(Since it’s challenging to produce that kind of power through solar, running your AC unit on solar is practically impossible.)
When you’re plugged in, running your generator, or actually driving, the 12-volt coach system charges.
While the RV is not connected, even without a generator, this smaller battery system can be used to power items like overhead fans, interior lights, and the water system — until the battery dies, of course.
Now that we know the general layout of the RV battery system, let’s get into the specifics of some of the most frequently asked questions about this vital component.
House Batteries VS Starter Batteries
It may be confusing for those unfamiliar with RV systems to learn that a typical motorhome needs two batteries.
The first is a typical car starter battery, used to give the engine a quick but potent kickstart when starting.
The deep cycle battery, coach battery, or RV house battery are some of the various names for the other type of RV battery.
Because they are in charge of supplying power to an RV’s cabin, house batteries for these vehicles discharge less energy (measured in amps) at once but must last longer.
When the RV is not in use, they power lighting, kitchen appliances, and other things.
You shouldn’t need to change a deep cycle battery very often since they last up to three or four times longer than starter batteries.
Which RV Battery Is The Best?
Depending on the campers you ask, there are a number of different RV battery options available, and you’ll probably hear passionate arguments for and against each kind.
Some of the more popular options are listed below:
- Deep-cycle batteries are lead-acid batteries that are comparable to those used in boats and golf carts. It is very similar to a car battery and generates and stores energy using the same chemistry, but deep-cycle batteries produce a constant amount of current over a longer period of time, as opposed to car batteries, which generate a lot of current quickly (since they must be charged while you are driving). There are many different subtypes of deep cycle batteries, such as gel-type batteries, absorbed glass mat (AGM) batteries, and flooded wet-cell batteries. Each of them has unique peculiarities and upkeep requirements.
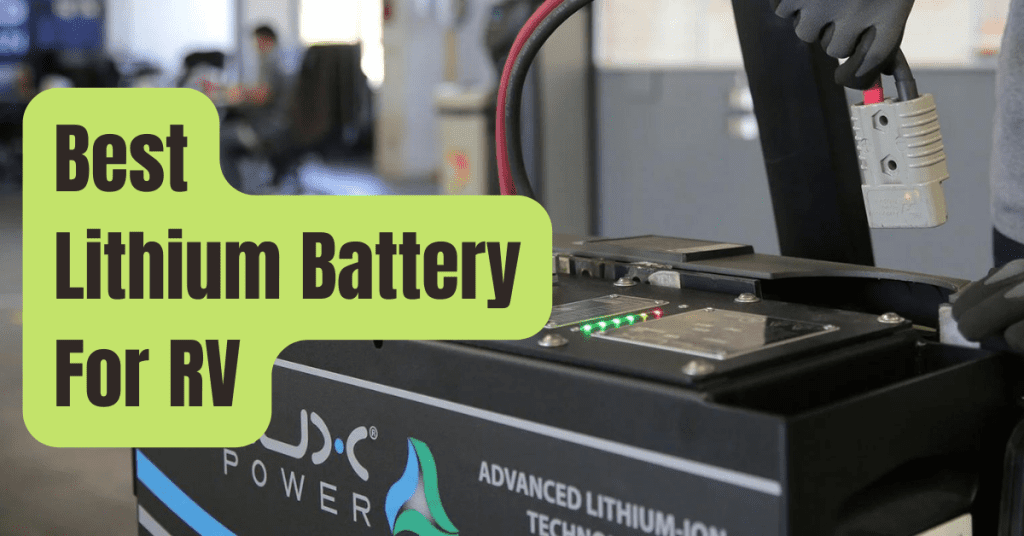
- Lithium batteries are a viable alternative to conventional lead-acid batteries, such as the deep-cycle batteries used in the majority of contemporary RVs. Many campers who outfit their RVs for solar power production switch to lithium batteries because, while being more costly, they provide a number of advantages over other kinds, including being smaller, lighter, and requiring less time-consuming maintenance. (For instance, lithium batteries are set-it-and-forget-it, while wet cell batteries need you to monitor and replace electrolyte levels.) Compared to other battery types, lithium batteries have a far longer lifetime and are often rated for 5,000 cycles, as compared to the 400 or so cycles that the majority of lead-acid batteries get. Nevertheless, they are around three times more expensive up front, making them unaffordable for some campers.
What Is A Battery Bank For An RV?
Battery banks are what you get when you combine two or more batteries; there isn’t a financial institution just for batteries.
When you need additional power, this raises the voltage or amps.
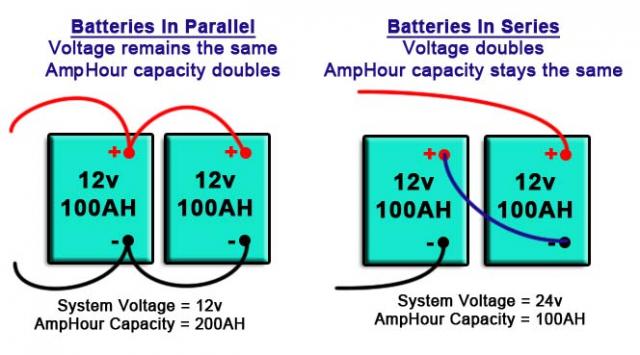
Stacked RV batteries
By connecting RV batteries in series, you may increase voltage while maintaining the same amperage.
For instance, connecting two 6-volt RV batteries in series yields a total of 12 volts while maintaining the same amps.
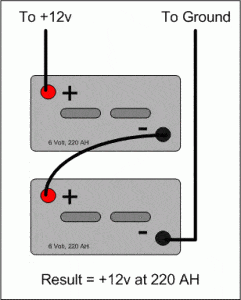
RV batteries are connected via a jumper wire.
One battery’s negative terminal is wired to the second battery’s positive terminal.
The remaining positive and negative terminals are connected to whatever the batteries are being connected to using a different set of connections.
Batteries that are connected have to be of the same voltage and amp rating.
Parallel RV batteries
A parallel RV battery bank enables the voltage to remain constant while increasing the current.
Two 6-volt RV batteries connected in parallel will provide 6 volts, but the amps will now be higher.
Two positive terminals are connected to two negative terminals to create parallel connections.
A negative negative and a positive positive are thus produced.
Once linked to your application, the batteries will discharge evenly.
Another option is a parallel bank in series.
You may raise the voltage and amps because of this.
A minimum of four batteries are needed.
Observe the connections you establish.
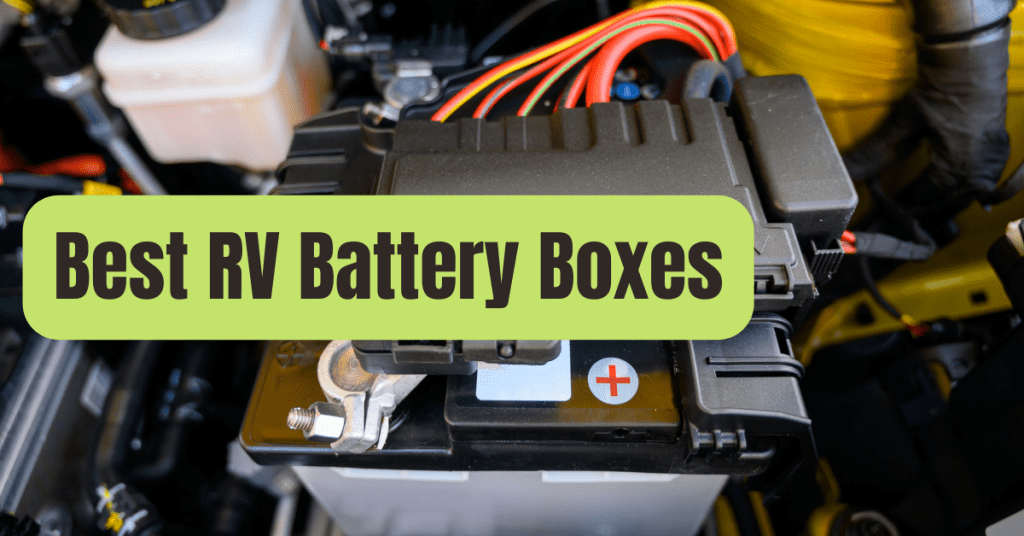
You may connect as many batteries as you want, but to keep your individual cells safe and secure, you might require an RV battery box.
A series power bank may be created by joining two parallel sets of batteries.
Battery Maintenance for RVs
The sort of batteries you have will influence how well you can maintain your RV’s batteries to some degree.
For instance, lithium batteries need almost no maintenance, as was already explained.
Other battery types, however, do have varied lifespans and maintenance requirements.
If you’re traveling with lithium ion batteries as opposed to wet-cell deep cycle batteries, for instance, the answer to the question “How long do RV batteries last?” would be considerably different.
Consult the manufacturer of the batteries in your RV for the most detailed maintenance recommendations.
So, let’s start with the fundamentals.
- Maintain the flooded-cell batteries’ electrolyte levels. With each charge cycle, flooded-cell batteries gradually lose water, and this water has to be replaced. To assist lower the possibility of sulfation, or the production of sulfate crystals, which may happen when the battery plates are exposed to air, you must use pure water. At least once a month, check the batteries and make sure they are completely charged before carrying out the required maintenance.
- Clean the battery terminals to eliminate any accumulated corrosion. You may scrape with a toothbrush while using a commercial battery contact cleaning product or a solution of one cup baking soda to one gallon of water.
- Sulfation might also be exacerbated by letting your batteries run out of power too quickly. Sulfation might start when your batteries drop below 80%, or 12.4 volts. Therefore, be sure to quickly recharge your batteries after using them.
- Try to often recharge your batteries. For instance, a battery that is drained to 50% each day would last twice as long as one that is discharged to 20% each day. Keep in mind, nevertheless, that prolonged exposure to high temperatures and overcharging may harm batteries.
Batteries for RVs
During the winter, recreational vehicles are often parked for months.
Batteries naturally deplete over time, so if you don’t take care of your battery, it will eventually run out of power.
This will shorten the battery’s lifespan.
Flooded cell batteries are destroyed by freezing.
Battery charge prevents freezing.
AGM batteries are more resistant to damage from freezing than flooded cell batteries, but it’s still crucial to avoid it.
Take into consideration disconnecting your car’s batteries and bringing them home with you.
Every month, check the voltage and charge it if it drops below 80%.
A fee for one night should be enough.
You will need to take a few measures to preserve your batteries alive if it is not feasible to remove them from your setup.
First, turn off the home batteries.
Small milliamps are used over time by appliances like radios, refrigerators, smoke alarms, and gas detectors, which may deplete your battery.
Even when everything is turned off, it still uses some amount of power.
As the batteries naturally drain, recharge them.
If you have access to your equipment while it is being stored, be sure to charge the battery completely once a month.
Uncontrolled solar panels may not be able to hold a charge or, worse still, may boil off electrolyte.
Additionally, converters should not be kept plugged in while the RV battery is being charged.
Your RV batteries will quickly boil dry if you do this.
While being stored, occasionally check your batteries.
Once a month will do, otherwise you may need to purchase new batteries for the next season.
RV Battery Watches
Without a monitor, it may be difficult to determine an RV battery’s real level of charge.
By detecting the energy going into and out of your battery as well as its level of charge or discharge, an RV battery monitor can provide you with a precise assessment of your situation.
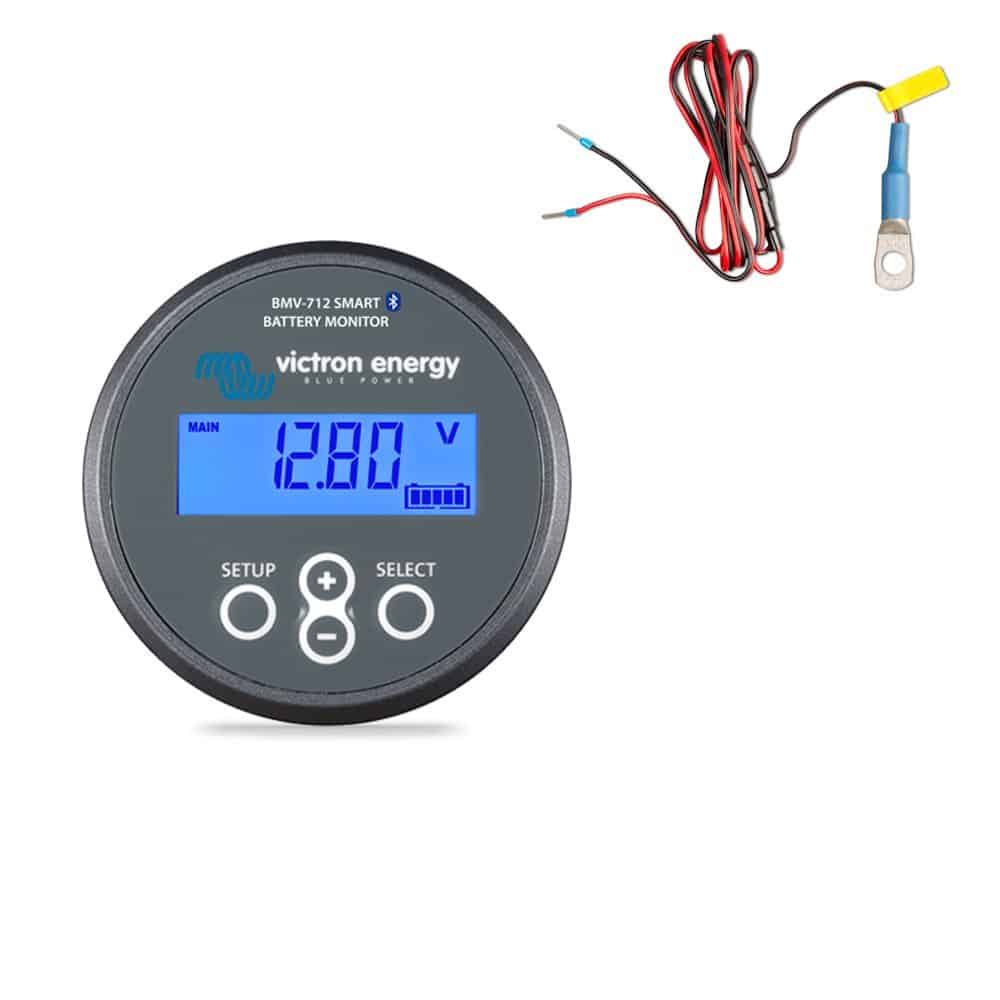
There are several varieties of RV battery monitors available, and the majority of them may be added as an aftermarket component to your RV battery system.
The majority of contemporary RV battery monitors come with cutting-edge enhancements like an LCD display that reads out all the vital information regarding your RV battery.
For instance, the Victron Battery Monitor has both a temperature sensor and Bluetooth compatibility, allowing you to monitor the condition of your RV batteries from your smartphone.
However, an accurate battery monitor doesn’t need to be complicated or costly.
It won’t provide updates to your phone, but it does allow quickly monitoring the state of your battery possible!
Charging of RV Batteries
The batteries in your RV charge when it is plugged into an electrical outlet.
Every RV is equipped with an RV Converter/Charger that transforms grid electricity into 12-volt DC and then directs this to the adaptor.
Batteries are also charged while your generator or the motorhome’s (or the tow vehicle’s) engine is operating.
When your apparatus is connected in, you may see that your batteries are charging.
Besides looking at your RV battery meter!
The water levels in your wet-cell batteries might be drained more rapidly if your RV is always plugged in, so if you camp this way, be sure to check them often.
Also keep in mind that allowing your batteries to discharge too much shortens their lifetime; thus, strive to keep them charged often.
What Is The Price Of An RV Battery?
As was already said, the price of your batteries varies greatly depending on the kind you choose.
For instance, whereas lithium battery installations might cost thousands of dollars, a single 12-volt, conventional wet-cell lead acid battery may cost several hundred dollars.
However, given their longer lifespans, lithium batteries may potentially be more cost-effective in the long run, making them a worthwhile investment if you have the cash up front.
How Is An RV Battery Installed?
Turn off any devices that use the battery, including small appliances like overhead lights, before installing an RV battery.
After noting the location of the present battery, disconnect the connections in the following order: negative first, then positive.
Insert the new battery, clean the cables and the terminals if required, and then rejoin the wires.
Test it out after installing any hold-down gear that came with the battery.
What Does A Battery Cutoff Switch On An RV Do?
The electrical power between your batteries and the RV is turned off using the battery disconnect button.
When your RV equipment isn’t being utilized, flipping the switch may assist prevent theft and electrical fires.
As a safety precaution, it’s also crucial to turn off the power while doing maintenance.
Finally, it guards against excessive drain on your RV batteries.
Even when your appliances are off, they are still drawing a little power from your batteries.
The procedure of installing your own cutoff switch goes rather quickly.
Depending on the switch you choose, some need changing the battery cover while others do not.
This switch really appeals to us.
The negative battery line from the RV is often routed to one side of the switch during installation, and then a shorter wire is run from the switch to the battery.
You won’t need to take out a wrench every time you want to disconnect these two wires since it will happen when you flip the switch.
You’ll wind up saving a ton of money if you take care of your RV batteries! Your batteries should last you about ten years, possibly even longer, if you treat them well.
When they’re not in use, disconnecting them will help to extend their lifespan and prevent you from having to replace them too frequently, which will save you time and money.
FAQs
Here are some of the most often asked questions concerning RV battery systems, along with the answers, to wrap up this piece.
What is the lifespan of RV batteries?
Your RV battery’s lifespan may vary depending on how well you take care of it, how often you use it, and what sort of battery you have.
Deep-cycle batteries may only last for 400 or 500 charge cycles, but lithium ion batteries may survive for up to 5,000 charge cycles.
How many batteries are there in an RV or a motorhome?
Your RV coach has two distinct battery systems, a 12-volt DC system and a 120-volt AC system, as was previously described.
Similar to your automobile, there is a 12-volt automotive system for performing essential automotive operations and starting the engine.
Does the RV battery charge while driving?
It does, indeed!
Do I need a battery for my RV?
It doesn’t require one, but…
But if you have batteries on board, everything will operate a lot more smoothly!

