It’s not necessary to just take RV trips during the hot summer.
In fact, some individuals choose to travel in their RVs year-round, while others use them in the autumn as a mobile hunting hut.
A heater or furnace is crucial in circumstances like these to keep you warm during the night and maybe even to keep you comfortable throughout the day.
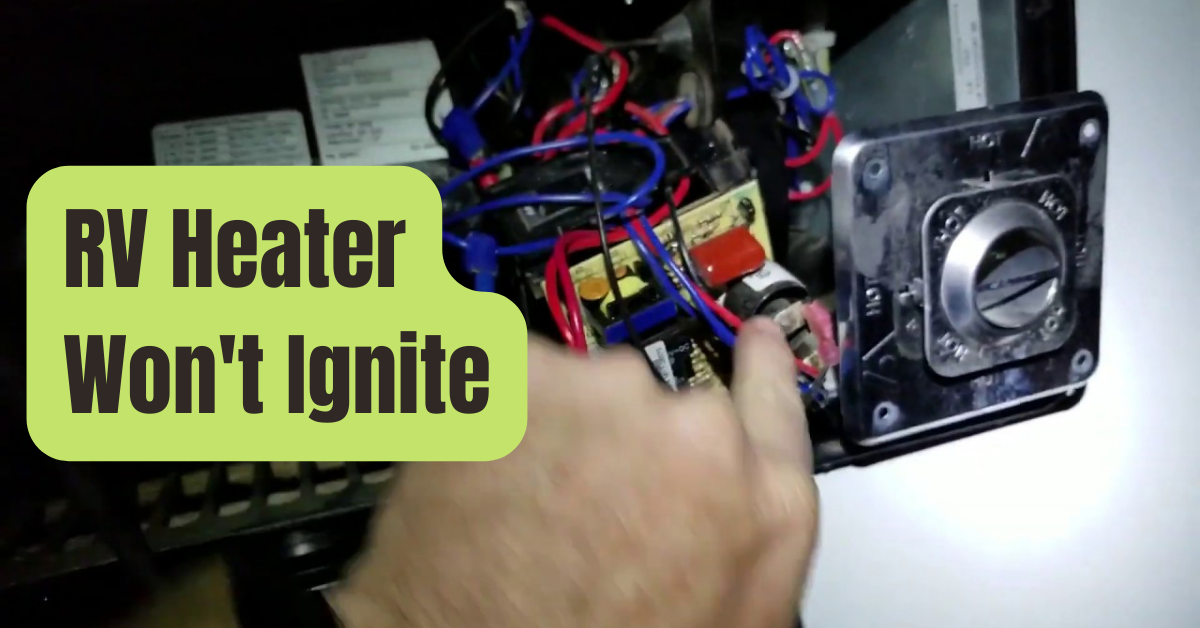
But what happens if the furnace isn’t operating properly? What should you do if the furnace in your RV won’t light?
You may be able to identify the issue and perhaps even repair it yourself with a little perseverance and mechanical know-how.
Even if nothing else, a repair shop’s labor costs will be reduced by having a better understanding of what’s happening.
This article will examine some of the most typical furnace issues that RVs encounter, how to identify them, and whether or not a DIY remedy is possible.
Causes of Your Furnace’s Failure to Light
An RV furnace may malfunction sometimes or be unable to ignite correctly due to a number of factors.
Typical reasons for a propane furnace to fail include:
- Tank issues with the propane
- Propane supply line issues
- A thermocouple that has failed and a pilot light
- Difficulties with the thermostat
- Difficulties with airflow
- Basic electrical problems
Why Won’t My Camper’s Furnace Operate?
Depending on the kind of furnace you have, the answer to this question may change a bit.
The propane tank should be checked first if you have a propane furnace or wall heater since it may be the primary cause of an RV furnace’s ignition failure.
Of course, the valve must be opened for any hydrocarbon gas to be delivered to the heater or furnace.
However, it’s also important to keep in mind that propane may slightly contract in cold weather, which might lower tank pressure.
It’s likely that the tank was at such a low level and that it was so chilly outdoors that it virtually froze.
Bring the tank inside if your RV’s interior is already reasonably warm to warm it up.
If the tank is huge or is being held in place by heavy-duty fittings, this might be a real pain in the neck.
Installing the tank outdoors after it has warmed up is possible.
You may be able to get through the night if the furnace keeps drawing continuously.
Try swapping to a spare tank if you have one available, and see if it solves the issue.
However, you shouldn’t rule out the potential that one of the propane pipes may be leaking.
An aging gas line may shred or split in cold temperatures, or a fitting may become loose.
When this occurs, the propane is simply unable to reach the furnace and ignite it.
How To Repair A Non-igniting Rv Furnace
#1. Identifying a Propane Tank Gas Lines Issue
Identifying if there is any gas accessible is the first step in diagnosing a problem with your propane tank or gas lines.
The internal propane stove, a two-way refrigerator, or any other device that uses the same gas line may all be started to accomplish this.
You can be confident that it’s not the propane tank or the pipes if it functions.
If there is no sign that gas is present in the system, you should check it beginning with the exterior tank.
#2. Dealing With A Propane Tank Or Gas Lines Issue
A propane coupler may sometimes come free in cold temperatures because the metal shrinks.
Check each one to make sure it is suitably tight by taking a time to do so.
You would detect the distinct odor of rotten eggs if there was a leak in an internal line running through the RV.
It could be more difficult to find the leak with only your nose if it is outdoors on the mainline.
If at all feasible, feel for any cracks or damaged places along the line using your bare hands.
Verify the location of the propane line’s entry into the camper body.
On a hose, gaskets may sometimes wear out and cause a small leak.
In an emergency, a little leak could be covered using a lot of duct tape.
If it works, it could help you sleep through the night, but it won’t be a long-term solution.
#3. Ignition Failure May Be Caused By Minor Electrical Issues
Most RV propane furnaces’ igniters need at least 10.5 Volts to effectively ignite.
There may not be enough spark to start the system or turn on the thermostat if one or two of your onboard batteries have run critically low or have been damaged.
It may sometimes just be a case of a circuit breaker tripping.
Therefore, verify sure the thermostat and furnace breakers are all in the “On” position by checking the panel.
Fixing An Electrical Issue With The Propane System
Try swapping to a backup battery that can provide more than 10 Volts, if at all feasible.
In an emergency, you may be able to utilize the motorhome’s or tow car’s 12 volt battery, but this is just a “Last Ditch” solution.
The last thing you want is to also have a dead car battery when stranded in the wilderness.
#4. A Wiring Issue May Prevent The Furnace From Igniting With Electricity.
If the onboard batteries demonstrate that they are providing enough power to the system, you should investigate the possibility that a broken or loose wiring is to blame.
This necessitates careful consideration when adhering to cables.
Starting with the furnace itself could be helpful.
Check all of the cables and connections again.
A connection or wire may sometimes come free while driving due to vibration.
A wire might potentially short out from overload, lose its protective covering, or get overloaded.
#5. Determining Whether There Is An Electrical Issue
Most RV propane furnaces’ igniters need at least 10.5 Volts to effectively ignite.
There may not be enough spark to start the system or turn on the thermostat if one or two of your onboard batteries have run critically low or have been damaged.
It may sometimes just be a case of a circuit breaker tripping.
Therefore, verify sure the thermostat and furnace breakers are all in the “On” position by checking the panel.
#6. How to Handle a Low or Dead Onboard Battery
You can quickly determine how many volts are being sent to the furnace by using a multimeter.
If it drops below 10 Volts, one of your onboard batteries is probably the culprit.
The furnace or thermostat won’t be able to ignite if enough electricity isn’t being given to them, and the fan may operate slowly or not at all.
Try swapping to a backup battery that can provide more than 10 Volts, if at all feasible.
In an emergency, you may be able to utilize the motorhome’s or tow car’s 12 volt battery, but this is just a “Last Ditch” solution.
The last thing you want is to also have a dead car battery when stranded in the wilderness.
#7. Battery Corrosion May Cause Service Interruptions
Examine the connections and battery terminals carefully.
A terminal may accumulate a substance that is white, gray, or even greenish over time as a result of electrolytic corrosion.
If left unchecked, it may prohibit the furnace system from receiving electricity.
An functional connection may sometimes be restored with only a little cleaning.
Corroded Battery Terminal Cleaning Techniques
- Step One: Combine water and baking soda to form a slurry.
- Step Two: Carefully remove the wires and connections from the corroded termination.
- Step Three: Carefully scrape away the rusted material with an old toothbrush and a baking soda slurry.
- Step Four: Completely remove the baking soda with a fresh paper towel.
- Step Five: Reattach the wires to the terminal and ensure that the heater, thermostat, and interior lights of the RV are receiving electricity.
#8. A Wiring Issue Can Stop The Furnace From Igniting With Electricity.
If the onboard batteries demonstrate that they are providing enough power to the system, you should investigate the possibility that a broken or loose wiring is to blame.
This necessitates careful consideration when adhering to cables.
Starting with the furnace itself could be helpful.
Check all of the cables and connections again.
A connection or wire may sometimes come free while driving due to vibration.
A wire might potentially short out from overload, lose its protective covering, or get overloaded.
#9. A Damaged Wire Prevented A Furnace From Lighting.
Check for any loose wires or connections between the battery and the furnace ignition system if this doesn’t help the problem.
Sometimes something as basic as rust on a battery connection might interfere with the efficient delivery of the required power.
You must tighten any slack wires or connections, or you may need to cut, strip, and secure them with wire nuts.
A broken wire may need patching, splicing, or even replacement.
If the battery’s terminals are corroded, washing them with water and baking soda and brushing them with an old toothbrush may help the connection become strong enough to provide the required power.
How to Change a Damaged Wire Section
- Step 1: Snip out the damaged area using a wire cutter.
- Step 2: Carefully remove the protective covering from the two exposed wire portions, removing an inch at a time.
- Step 3: Strip the protective coating off a fresh segment of wire that is the same gauge or thicker by an inch on either end.
- Step 4: Braid the wire’s exposed ends together. Then, you may solder them, wrap them in electrical tape, or tightly coil them within a tiny wire nut.
#10. The Propane System Could Fail Due To A Thermostat Issue
The heating and cooling system’s “Brain” is, in essence, the thermostat.
It’s not unheard of for one to burn out or have a component fail, even though they are designed to endure for a very long period.
Many times the sensor inside of it fails, in which case you must replace the complete device.
The thermostat may sometimes malfunction due to issues like a loose cable or a dead battery, however.
When this occurs, neither the furnace’s safety systems nor the signal to light the furnace are transmitted.
#11. Inspect The Thermostat’s Wiring And Tighten Any Loose Wires.
A loose wire may be at blame if your thermostat has a digital display screen and it is flickering or providing wildly erroneous readings.
You must gently remove it from the wall in order to confirm this.
Verify each link.
Some are attached with small screws that may get loosened and just need retightening.
#12. Examining And Changing The Batteries In Internal Thermostats
Some RVs don’t have a direct connection between the thermostat and the onboard 12-Volt batteries.
These devices often use AA or AAA batteries.
Many of these instances include the display panel flashing, not responding to button presses, or even providing a blank screen.
You may just have to change the batteries in this situation.
While you’re about it, inspect the connections for corrosion.
The thermostat should then be turned on and given a few minutes to reset its internal software.
The thermostat should function correctly and the furnace should start up again if the issue is in fact a simple low battery issue.
What To Do If The Rv Furnace Blower Turns On But Won’t Light
There are also instances when the RV furnace may start to produce hot air, but the blower fails to do so or just produces a meager stream of air.
This might be a number of things, including:
- Unreliable pilot lights
- An unreliable thermocouple
- A blower fan malfunction
- Ventilation problems
#1. Managing A Fixable Pilot Light Issue
When safety sensors fail or there are airflow difficulties, the furnace blower may start, but the pilot light may not illuminate.
The thermocouple and the sail switch are the first two things to look at.
In essence, a sail switch is an on/off switch that senses inadequate airflow.
In this case, it will prevent the furnace from lighting, but the blower will start to blow.
The fan will probably still run, however.
If there isn’t enough return airflow or venting, the sail switch is more likely to burn out or fail.
They sometimes have a tendency to stick.
There may be an issue with the sail switch if the fan is going but there isn’t much heat.
Here are some steps you may take to troubleshoot the issue.
Verify that the furnace unit is receiving 12 Volts from your battery.
To discover whether the furnace fuse or breaker has blown, you need also check the breaker box.
Next, look again for any evidence of dust or soot accumulation in the vents.
The RV’s exhaust vent is included in this.
If soot is accumulating, the furnace probably has inappropriate or inefficient combustion going on.
#2. Recognizing A Sail Switch Issue
In essence, a sail switch is an on/off switch that senses inadequate airflow.
It could remain in the off mode or off position if anything has obstructed the air intake or exhaust vent.
When this occurs, the fan may start up and attempt to blow or blow ineffectively.
It may also instruct the other components of the safety system to stop the furnace from lighting.
Try cleaning the air intake or exhaust vent if you see cobwebs or other material there.
Next, look again for any evidence of dust or soot accumulation in the vents.
The RV’s exhaust vent is included in this.
If soot is accumulating, the furnace probably has inappropriate or inefficient combustion going on.
You should reset the system by switching off the furnace or the thermostat once any debris has been removed.
Then, switch the power back on after giving them a full minute.
The system should thereafter attempt to function properly.
There may be a technical issue with the sail switch and you need to replace it if the fan is operating but the furnace is still not lighting.
You must first verify that your battery is supplying 12 Volts to the furnace unit before you can begin troubleshooting it.
To discover whether the furnace fuse or breaker has blown, you need also check the breaker box.
#3. Pilot Light Ignition Can Be Prevented by a Compromised Thermocouple
Most gas furnaces include a thermocouple, which is a specific safety component.
In essence, it is a sensor that detects the temperature within the furnace.
It is composed of two tightly connected wires made of various metals that form a junction.
There is a millivolt signal produced by the thermocouple itself.
It monitors the voltage if the resistance changes.
The furnace’s control system then monitors any changes in resistance.
In essence, it checks if the pilot light is on before turning on the main gas valve.
The pilot light goes out and the furnace won’t release gas when a thermocouple burns out or malfunctions.
Sometimes the thermocouple has to be cleaned of dust and spider webs in order to function properly.
A thermocouple’s condition cannot usually be determined just by looking at it.
When you initially put on the heat, it might sometimes smell like rotten eggs.
You should verify the thermocouple with a multimeter if everything surrounding it seems to be clean and all the other electrical parts are connected correctly.
It probably has to be changed if it doesn’t indicate any power being sent to the thermocouple.
Thankfully, a new thermocouple is inexpensive and simple to replace.
You may most likely find a replacement for your model of furnace at hardware shops and RV dealerships.
If not, you may have to use a portable heater made of sunflower seeds or run the engine of the RV while the heat vents are on to get through the night.
#4. A Faulty Or Damaged Blower Fan
There are two possibilities for this.
It may be the fan motor failing if you feel a little heat yet the fan is producing little airflow.
An older RV is more prone to experience this.
It often has to do with internal bushings or bearings wearing out.
However, a wiring problem is another possibility.
Make sure the fan blades aren’t obstructed by cobwebs, dust, or any other debris by checking twice.
Check out the motor housing while you’re at it.
A fan that has poor bushings or bearings can produce a lot of heat.
Wire connections on blower fans are typically soldered.
The circuit won’t complete and the fan won’t turn on if one of them has come free.
Sometimes a link loses its grip, resulting in intermittent or low power.
Try soldering a damaged or loose connection back into place if you locate one.
Once the system has been reset, check to verify whether the blower is operating normally.
How to Handle a Dead Blower Fan
You’ll probably need to replace the blower fan if it’s broken, noisy, or dead.
This necessitates locating a fan that is comparable and will fit within the housing.
In some cases, doing this is as simple as bringing your burned-out fan into a hardware shop.
Other times, you may need to purchase a replacement blower fan on demand, which might delay its delivery by more than a day or two.
Changing A Damaged Or Dead Blower Fan
You may be able to change the blower fan yourself if you are exceptionally handy, have the right equipment, and the time.
If you don’t feel confident doing this, you may want to hire an expert to assist with the installation and removal.
Step One: Turn off the electrical circuit breaker
Step Two: The blower fan’s fasteners must all be removed
Step Three: Unplug the cables from the blower fan’s back. A heat gun or a soldering iron could be required for this. You may just need to remove a few little screws from some.
Step Four: Join the outdated wires to the ports on the new blower fan. To create a safe connection, you may need to solder them into place if required.
Step Five: Reinstall the blower fan in the housing and tighten all of the bolts.
At that moment, you should attempt to restart the system by turning on the breaker.
It will take some time for the furnace to start and produce hot air.
The replacement blower fan should then produce hot air as usual at that point.
The Best Ways To Stay Warm During A Furnace Emergency
RV heater issues can occur when least expected.
Before embarking on a journey where you anticipate using your RV’s heating system, it is always a good idea to double-check it.
However, despite your best efforts and routine maintenance, your furnace may sometimes stop working without warning.
Installing emergency heat can be your first course of action if it’s especially chilly inside the RV.
especially if you are unable to move the RV to a safer area.
You can lose the dexterity required to locate and address the furnace issue if your hands get too cold.
There are a few things you may do to stay warm if you don’t have the components to fix the issue and it’s too tough to pick up and relocate for the night.
A small sunflower heater and two one-pound propane canisters should always be kept in an emergency locker to provide some temporary heat.
If the temperature is not too low, you may try burning some candles to warm the air.
If you have fire-rated bricks on hand, you may be able to put them in a 30-minute bonfire outside if you cover them in tinfoil.
The heat will be gradually absorbed by them.
They may then be brought inside the RV and put on the stove to radiate heat.
This may also help you keep your hands warm as you try to figure out the furnace’s issue.
As a Result
To ensure a quick repair, it’s essential to diagnose your RV furnace issues in a methodical manner.
You may be able to fix it yourself in some of these situations.
However, there are situations when a DIYer cannot solve an issue because it is too technical.
If expert help is required and you can’t get to a repair shop right away, you may have to make do for a night or two to remain warm.

