It never takes long for Rachel Oldenburger to make her first trip to IKEA when she begins a new RV refurbishment.
The Swedish furniture company, according to Oldenburger, who operates RV Family Renovators with her husband Jake, is the ideal location to hunt for furnishings that have a significant aesthetic effect without being too expensive.
In addition to being incredibly affordable, Oldenburger notes that IKEA’s products are also lightweight since they are constructed of medium-density fiberboard.
You are able to fit bigger bookcases, tables, and chests that would be impossible to fit in an RV if they were made of solid wood.
According to Libby Behrens, who chronicles her DIY RV mod projects on her Instagram account @behrnecessities, the retailer’s furniture also often has a smaller footprint and a more minimalist appearance.
She explains that since the sizes are lower and everything is designed with simple, unadorned lines, “you can modify anything.”
#1. The Recognizable Cube Unit
The KALLAX is one of the most recognizable “IKEA” products.
The cube unit is available in many sizes and configurations, and you can adapt it to suit different storage requirements thanks to the broad selection of baskets, shelves, drawers, and doors that are made to fit within the unit.
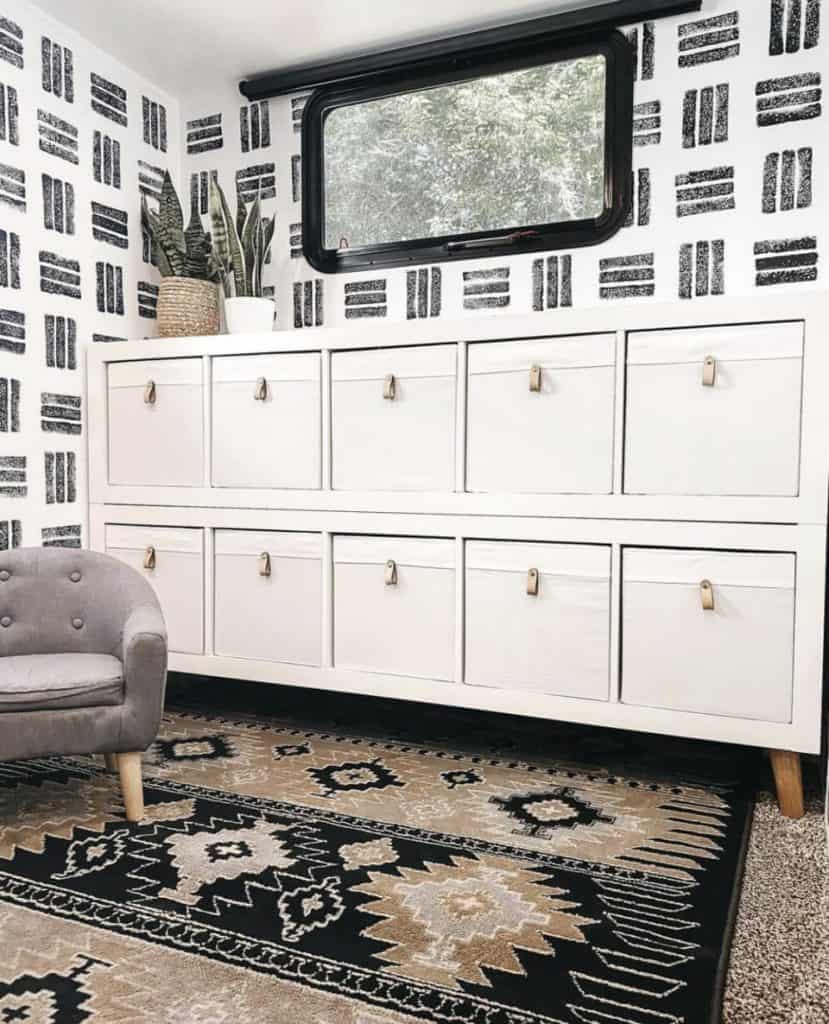
The best advice from Behrens is to increase height.
She turned a KALLAX cabinet sideways and affixed four feet to the bottom to make storage for her son’s toys.
In order to maintain a steady airflow in an RV, she explains, “we elevated it up off the ground.” “You don’t want spots beneath your furniture where condensation may gather since moisture can lead to mold and mildew.”
Nearly every refurbishment at Oldenburger includes the KALLAX, and it’s not often simply for storage.
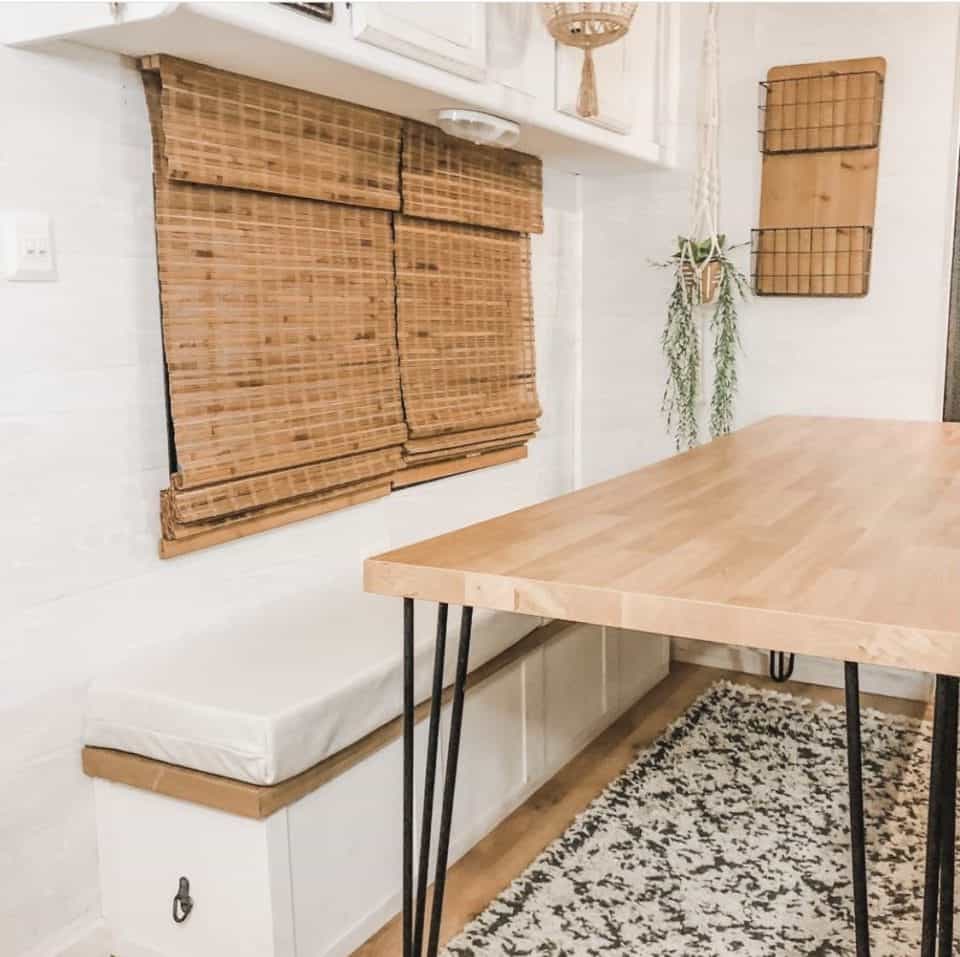
Her most recent effort included utilizing a KALLAX with an additional wooden top piece to construct a bench for the dining room.
She constantly adds simple trim components to IKEA furniture to make it seem bespoke.
Trim is important, she claims.
“With IKEA, you can often see the bolts and other hardware on the sides.
Trim gives it a personalized appearance and conceals the bolts.
#2. Use Different Countertops
In the bathroom of her own RV, Oldenburger chose a thin, IKEA laminate countertop with a wood finish.
She thought of the countertop when she was considering how to make use of the area after taking away the dinette.
We added additional hairpin legs and one more slab to create a 25-inch-wide, almost 6-foot-long dining room table for our trailer.
#3. Use A Rail System To Provide Vertical Storage.
Every available square inch must be used when it comes to storage, particularly in the kitchen.
Behrens enjoys entertaining and has a number of large charcuterie boards, but her trailer lacked a handy place to store them.
She then used her creativity.
There is an IKEA rail system, which includes buckets you can use to store items like cutlery and hooks for hanging things.
She constructed the ideal location for her charcuterie boards by installing two rails and fastening a skinny piece of wood to the wall under one of them.
She hangs vegetable sacks on the lowest rail.
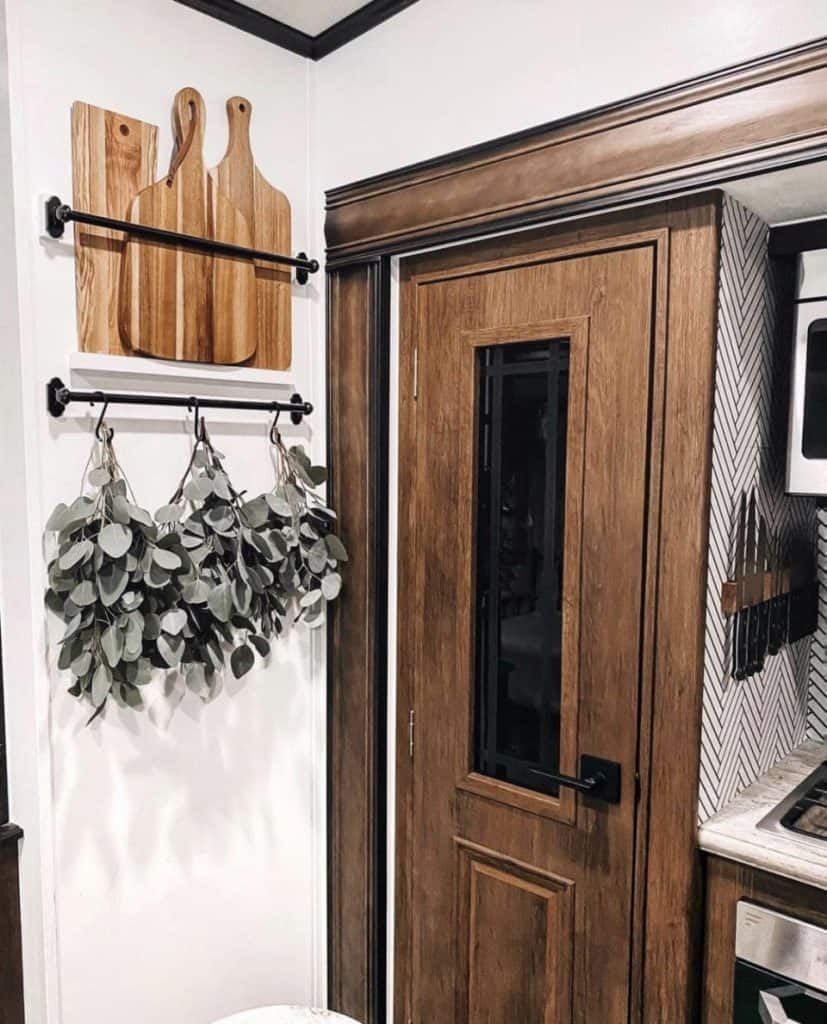
When we have our produce in there, we utilize it because we can see it and it’s accessible, she adds, adding that it keeps things up off the counter.
Additionally, the slide is located there, and because there is enough room, the rails can remain in place, I won’t need to worry about pulling anything down when we move.
#4. Shoe Storage Need Not Be Limited to Shoes
IKEA furniture that Oldenburger often uses is intended to retain shoes.
Products like the BRUSALI, HEMNES, and BISSA cabinets are small and have doors that fold down to open.
They may be used to store other things as well, preserving room for a shoe collection.
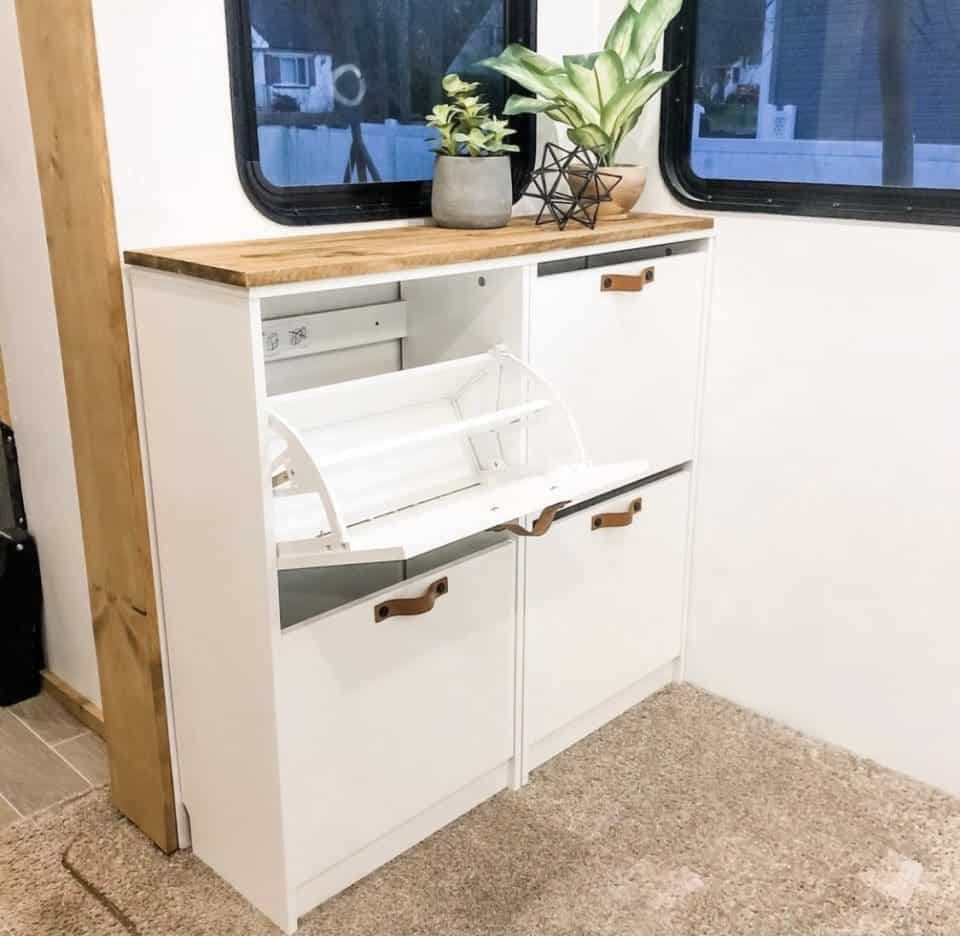
According to Oldenburger, “They’re so thin, at times they can go in a hallway or doorway.” “In my last RV, I utilized it to store stuff for the family, including the kids’ homework and books.”
#5. Use Strip Lights To Add Brightness.
RVs have crevices, and standard lighting fixtures don’t always give forth enough light.
However, replacing them might be difficult since the wiring for RVs is hidden behind the walls.
Even if you have the necessary electrical skills, Oldenburger warns that you “will have to cut into the wall to accomplish it.”
Instead, respect the battery’s power.
The STTTA battery-operated strip lights from IKEA are discrete and simple to install.
Put them along the baseboards, inside the closet, or under your kitchen cabinets to create a fast, simple lighting scheme for your RV.
#6. A Desk That Allows For Remote Work
The majority of RVs weren’t designed with employment in mind.
That implies that you’ll have to think of inventive placement options if you require an office space or a desk.
Finding the ideal workstation proved to be difficult during a recent refurbishment for a family that intends to live and work full-time in their RV, according to Oldenburger.
The slide that comes in with the bed and was first pressed up against this really thin dresser makes the bedroom in this particular RV seem cramped, she adds.
They need a desk to enable them to work from home, but I was unable to locate one that did both.
Later, when shopping at IKEA, she came upon the SVALNS, a wall-mounted desk without legs.
According to Oldenburger, “when the slide comes in, the bed clears exactly beneath the desk.” “Run out and get this if you’re working from your RV.
It makes the ideal RV workstation.
The appeal of IKEA is that many people live within commuting distance of one of its less than 100 stores in the United States and Canada.
Even some items may be purchased online at Amazon.com.
Additionally, all of the furniture is delivered in boxes and may be put together within your RV.
The final and maybe most significant IKEA purchasing advice comes from Oldenburger.
She advises, “Bring a tape measure and all your measurements with you into the shop.” “You are aware of the proverb “measure twice, purchase once.

